Showing posts with label mercenaries. Show all posts

Tuesday, December 13, 2016

Cephalyx Mercenary Army

Cephalyx Mercenary Army

I've finally got my MK3 Cephalyx army built and painted! I'm really excited to play Thexus in MK3. He's got some amazing spells and abilities that I don't get with Khador. I'm thinking about doing a Thexus paring with a Bart Double Galleon or maybe just a Cyphon. I'm really into the theme and the model designs. It's going to be fun!

My current army includes:

Warcaster: Thexus
Warcaster: Cyphon
Warjack: Wrecker
Warjack: Wrecker
Warjack: Wrecker
Warjack: Subduer
Warjack: Warden
Unit: Mind Benders
Unit: Mind Benders
Unit: Mind Benders
Unit: Mind Slavers
Unit: Mind Slavers
Unit Attachment: Dominator
Solo: Agitator
Solo: Agitator
Solo: Agitator

Monday, February 22, 2016

Boomhowlers - Finished Paint Job

Boomhowlers Painted
Finished Boomhowlers

I've had these Boomhowlers sitting around for months now unpainted and finally got around to it. My group has basically asked me to play with less units because of how un-fun my play style is for running my models as far as I can to jam up their guys and set the line of battle way up on their side and win on scenario.

I play Khador, that's kind of what we do. It's not like our jacks are any good.  

I guess the Boomhowlers don't help much with that situation but I plan to run them in a list that will be just as annoying but more fun for my opponents.

Here's my Mercenary list for next week:

Warcaster: Captain Bartolo Montador
Warcaster Attachment: Sylys Wyshnaylrr
Colossal: Galleon
Warjack: Mule
Warjack: Mariner
Unit: Boomhowlers
Unit: Lady Aiyana & Master Holt
Solo: Master Gunner Dougal MacNaile
Solo: Orin Midwinter
Solo: Ragman

I know everyone says Broadsides sucks and is a trap but I want to try it out. I've got Sylys to upkeep Hot Shot on the Galleon and 3 Warjacks to lob shots at the enemy. I know the Mule is bad for this because of its short range out of activation but it's the only other Merc jack I got. Dougal kind of fixes it for one turn while Ragman is there for whatever the Galleon decides to drag in. Orin is in the list because I rarely get a chance to play him.

The goal is to cast Hot Shot on my Galleon turn 1 and run everything up. I'll use the Boomhowlers to screen my jacks as they reign down deadly AOEs while Dougal gives them a mini boost. I then will pop feat on the top of 2 to keep everyone away from my jacks then slowly pick apart the big threats. Once I clear out most of the guys I will drag any big baddies to me unless they have a Colossal which then I'm kind of screwed. I don't know if I can really trade shots with a Stormwall but we'll see.

I'm only playing with 1 unit instead of my 3+ and relying on my range threat to soften the enemy up and then finish hard with the help of Ragman and Aiyana. It could be a fun attrition list. 

Saturday, October 3, 2015

Cephalyx Mercenaries

cephalyx exulon thexus mercenaries

Working on getting my Cephalyx All-in-One-Box painted this weekend. I'll post more pictures as I make progress.

Thursday, October 1, 2015

Visit to Table Ready Terrain + a quick Khador vs. Mercenaries game that didn't end well.

Last week I got an invitation from Rob at Table Ready Terrain to come see some of his work. He has some amazingly detailed terrain made from all sorts of different materials like Pringles cans, coffee stir sticks, and pink insulation foam. It's something his wife calls, "upcycling." We use his terrain at GMI all the time and I've even seen them used on Chain Attack videos.

Rob is also an amazing painter and terrain builder and it's a damn shame that his TURNS TAKE FOREVER.


After taking a look at how he makes his stuff I got a chance to play a quick game with him. He played his Damiano list with Rocinante, Devil Dogs with Buccaneer, Nyss Hunters, Steelhead Halbs + Cav, Gudran, Harlan, Piper, and Aiyanna & Holt.

I played an pIrusk list that I wanted to try with Conquest, Great Bears, Widowmakers, Widowmaker Marksman, Aiyanna & Holt, Sylys, Harlan, and the Kayazy with Underboss.


The game went pretty well till my wife got home and told me I left the front door unlocked and forgot to feed the dogs. I packed up my things and we never finished the game. It looked like he was in a bad spot vs. the Kayazy and Great Bears because I have access to Iron Flesh and Battle Lust. He might have cleared a few out but they'd be sitting at 19 DEF at the end of my turn. Conquest was also unhurt toeing the zone. My plan would have been to clear out the right zone, contest the left zone with Conquest while hurling shots at Rocinante.

He could possibly pull off an assassination with Rocinante if I didn't blow off his gun hand on my turn. Inhospitable Ground would have halved his threat range for all melee attacks.

It was a fun game and wished we could have finished but I got in trouble. Oh well. Good times.

Visit TableReadyTerrain to pick up some professional non-mousepaddy awesome looking terrain!

Oh, here's some non professional terrain I designed using some mouse pad material;

Saturday, September 26, 2015

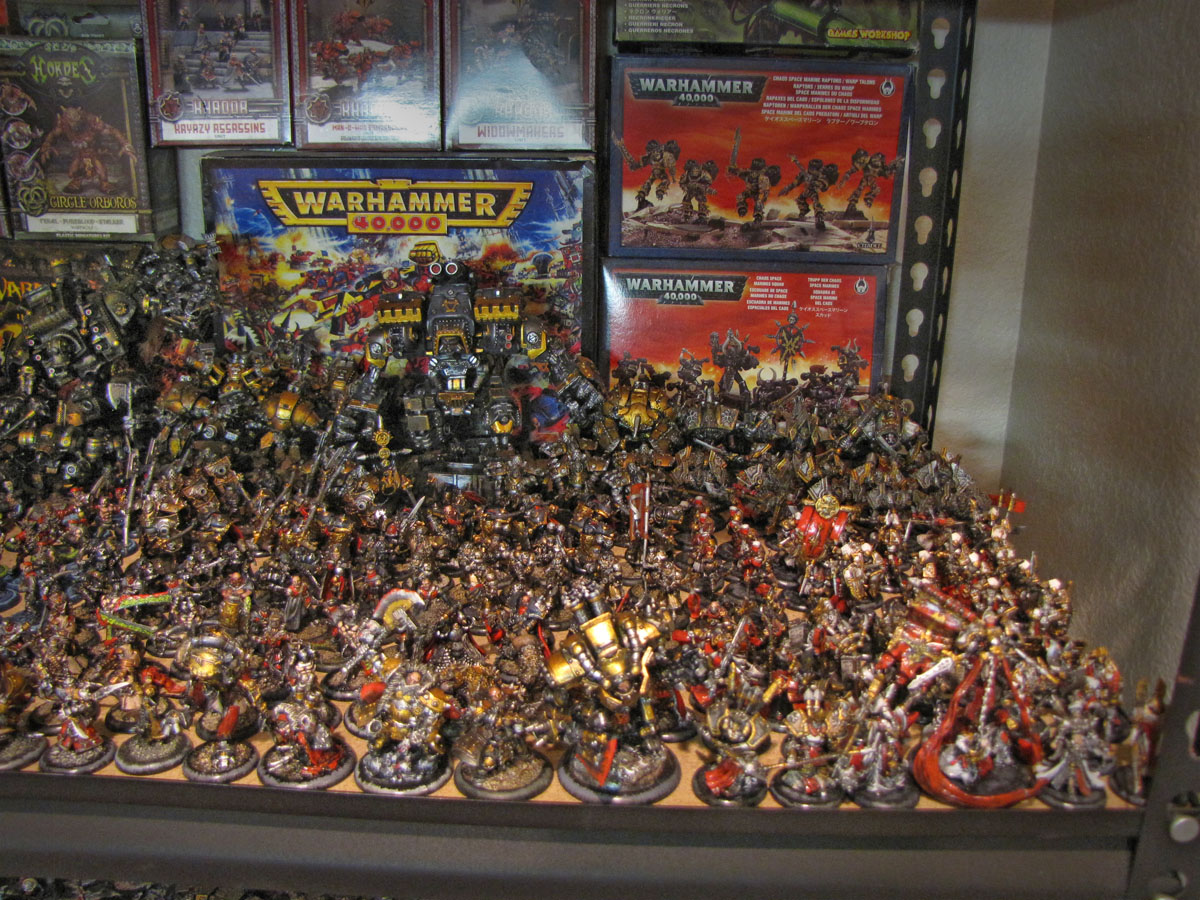
My Warmachine Shelf - My Entire Painted Collection

 Here are some shots of my Warmachine shelf.

Khador and Menoth

Pirates and Khador

Legion of Everblight and Circle Orboros

I'm always looking to trade Legion and Menoth if anyone is interested :)

Wednesday, September 16, 2015

Khador vs. Mercs - Butcher 3 vs. Drake MacBain (35 Points)

Tonight was the second time I delved deep into the world of miniature table top wargaming, or as normal people call it, playing with my little plastic friends. Rob, the owner of Table Ready Terrain (tablereadyterrain.com) found me on Facebook and challenged me to a 35 point Steamroller 2015 match up.

For this game we played Outflank which has 2x circular zones that can be controlled for 1 point or dominated for 2.

Rob from Table Ready Terrain getting ready to deploy after winning the starting roll.


For my list I decided to bring Khador and flex my Butcher 3 muscles. He is definitely a fun caster to play but has his share of bad anti magic match ups.

Khador - Butcher 3 - Butcher Unleashed

Warcaster: Butcher 3  (-4)
Warcaster Unit: War Argus
Warcaster Unit: War Argus
Warcaster Attachment: War Dog (+1)
Warjack: Ruin (+10)
Warjack: Juggernaut (+7)
Unit: Kayazy Assassins (+8)
Unit Attachment: Kayazy Underboss (+2)
Unit: Aiyana & Holt (+4)
Solo: Saxon Orrik (+2)
Solo: Widowmaker Marksman (+2)
Solo: Ogrun Bokur (+3)

Butcher is the driving force in this list. He won't start the fight but he sure will end it. The goal is to use the Juggernaut to initiate a piece trade and end that transaction with Butcher smashing face. The Kayazy are MAT 9 with Gang and DEF 16 in melee. They are there to jam while Aiyana & Holt are there to assist them against higher ARM. The Ogrun is just for security because Butcher sometimes gets shot off the table. Shield Guard allows him to dodge a silver bullet.

Mercenaries - Drake Macbain

Warcaster: Drake MacBain  (-4)
Collosal: Galleon (+18)
Unit: Press Gangers (+6)
Solo: Bosun Grogspar (+2)
Solo: Wrong Eye(+9)
Warbeast Snapjaw(+9)
Warbeast: Bullsnapper (+3)
Solo: Master Gunner Dougal MacNaile (+2)

Rob brought a Galleon ARM skew list. MacBain's Fail Safe (+2 Armor, Warjack doesn't suffer crippled effects) and the Bullsnapper's Spiny Growth (+2 Arm) brings the ARM total of the Galleon to an impressive 23. The Press Gangers are there to jam and buy time while the Galleon drags heavies to their scrap metal death.


Rob wins the roll and elects to go first

Rob casts Fail Safe on the Galleon and runs everyone up. He ends his turn with casting Spiny Growth on the Galleon making his ARM total 23.

On my turn I run most of my units up but I cast Energize with Butcher 3 to get my battlegroup and Warjacks up 3 more inches. I almost screw everything up because I forgot that Ruin had Abomination instead of Terror which forced command checks on my Kayazy and Ogrun Bokur. Lucky for me they both passed. 

After that debacle I offer up the Juggernaut to the Galleon hoping he'll spend a turn killing it while I set up Ruin and Butcher for a counter attack. I tried to block the Juggernaut from being dragged by some Kayazy and the War Argus but forgot the Galleon had blast damage on his rapid fire guns.

End of Turn 1

Rob upkeeps Fail Safe on the Galleon and allocates it 3 focus. He then charges in with his Press Gangers but unfortunately isn't able to kill any Kayazy. He then activates Galleon and after a 3rd party confirmation and a laser line check, he is able to drag the Juggernaut to his death. He ends the turn casting Spiny Growth on the Galleon.

Yes! He took the bait! Now I just have to close the deal... but wait... am I too far? Uhh... I think I'm just a hair shy from Ruin and Butcher wreaking havoc on him! I activate Aiyana & Holt and cast Kiss of Lyliss on the Galleon but I'm about a half inch too far and miss. I am able to kill the Bullsnapper with Holt though which really helps. My plan was to get the -2 ARM Debuff on Galleon and charge in Ruin to remove Fail Safe, then finish him off with the Butcher. Unfortunately, I have to activate Butcher first and cast Energizer to make sure I am in charge range for everyone.

Butcher then charges and I roll incredibly bad on 6 hits, not damaging any systems. I have 3 focus left after popping my feat and I have a decision to make. Should I spend the 3 and take a shot at killing the Galleon and then set myself up to be Ganged by MacBain? No. I decide to camp the last 3 focus. 

I activate Ruin and he charges in with 3 focus. I almost forgot about Dispel on his weapon but that was crucial to remove Fail Safe. After Ruin's activation, Galleon has a crippled Left Side but still has his massive Trident.

I pop the Kayazy mini feat and charge them through the Press Gangers and get a couple shots at the Galleon only doing about 5-6 damage to him. I run the War Dog and Ogrun Bokur to help the Butcher against his final stand and end my turn. 

I do end up moving into position and scoring 1 point for controlling one of the zones.

Mark 1 - Rob 0

Mercenary Turn 3

Rob goes in the think tank for quite a while. He's trying to decide the best way to handle the situation. The War Dog is a huge problem for him as it bumps Butcher's defense to 16. In the end he decides to allocate 3 to Galleon and smash away. He boosts to hit on all of his shots and hits 2 out of 3 leaving Butcher on 6 health. He then buys 3 Jackhammer shots needing hard 10s to hit and misses them all.

He moves his Press Gangers in and try to take out the Kayazy but fail. He also tries to charge Bosun Grogspar at Butcher but eats 2 free strikes from the Kayazy and dies. Wrong Eye and Snapjaw are able to handle Ruin and leave him a steaming pile of wreck marker. MacBain, sensing impending doom, moves back since the scenario is not Killbox and ends his turn.

Mark 2 - Rob 0

On my turn, instead of risking being left wide open after killing the Galleon I decided to wipe out the Press Gangers instead. Those nasty pirates tough the hell out of their rolls and force me to use everything I've got. In anti-climactic fashion I am able to kill over half his unit forcing him to make a tough check. They fail and there's no one to contest the zone. I simply toe the zone with Butcher and dominate for 2 points and have Aiyana & Holt with the Widowmaker Marksman control the other bringing my total to a game winning 5 points.

Mark 5 - Rob 0

End of the Game - Khador Victory by Scenario

Overall a very good game. It could have gone either way with just a simple dice spike. Rob did a hell of a job almost killing Butcher. I got pretty lucky on making the call to camp the 3 focus instead of trying to finish off the Galleon because without it, Rob would have had exactly enough to kill Butcher.

Final Thoughts

I made a couple of huge mistakes this game. My first mistake was thinking Ruin had Terror instead of Abomination and forcing myself to make command checks on both my own Kayazy and Ogrun Bokur.

The second mistake is that I placed 2 Kayazy base to base with the Juggernaut trying to stop the drag, forgetting that the Galleon had AOE which wiped them out like nothing when the attack targeted my easy to hit Juggernaut.

I wouldn't change too much of the list at 35 points. If I were playing this in a two list pairing for Steamroller I might take out Aiyana & Holt so I can get better use out of them in another list. I'm pretty comfortable with the Kayazy and their mini feat really catches a lot of people off guard and is hard to plan for. I could try Iron Fang Black Dragons but that isn't my play style. I could also switch for some Nyss Hunters but lately I haven't had too much luck with them other than just being a contesting jam unit. I might put in the Widowmakers instead to help clear a path for Butcher and his Jacks.

I do love Butcher 3 and his pups. There's a tournament at GMI Games on Saturday and if I go I'll most likely play him with either pVlad, pSorcha, or Old Witch. There's a lot of Trolls in the Inland Empire meta though so I need heavy hitters.

Till next week!

Saturday, September 12, 2015

Khador vs. Mercenaries - Butcher 3 vs. Captain Phinneus Shae Battle Report


Today we have an epic 50 point battle between Captain Phinneus Shae and Butcher 3. Shae and his speedy antics will surely get the alpha strike but will it pack enough punch to weather the vengeance of Butcher 3's retaliation? Let's take a look at the lists.


Mercenaries - Talion Charter (Tier 3)


Bonuses: (+1 Starting Roll, Models have Pathfinder on first turn, -1 Cost to Solos)

Warcaster: Captain Phinneus Shae  (-6)
Colossal: Galleon (+18)
Unit: Press Gangers (+6)
Unit: Sea Dog Boarding Crew (+8)
Unit Attachment: Mr. Walls the Quartermaster (+2)
Weapon Attachment: Sea Dog Rifleman (+2)
Unit: Aiyanna & Holt (+4)
Unit: Commodore Cannon & Crew (+4)
Solo: Lord Rockbottom (+1)
Solo: First Mate Hawk (+1)
Solo: Doc Killingsworth (+1)
Solo: Bosun Grogspar (+1)
Solo: Dirty Meg (+1)
Jack Marshalled: Mule (+8)
Objective: Effigy of Valour

The goal of this list is to run up hard and get Alpha Strike then have the Galleon drag in heavies and destroy them while a dozen +4 Tough Sea Dogs create a wall in front of it hopefully preventing retaliation.


Khador - Butcher 3

Warcaster: Butcher 3  (-4)
Warcaster Attachment: War Dog (+1)
Warjack: Ruin (+10)
Warjack: Behemoth (+13)
Unit: Kayazy Assassins (+8)
Unit Attachment: Kayazy Underboss (+2)
Unit: Winter Guard Infantry (+6)
Unit Attachment: Winter Guard Office & Standard (+2)
Weapon Attachment: Winter Guard Infantry Rocketeer x2 (+2)
Unit: Widowmakers (+4)
Solo: Widowmaker Marksman (+2)
Solo: Kovnik Jozef Grigorovich  (+2)
Solo: Saxon Orrik  (+2)
Objective: Fuel Cache

The goal of this list is to push a wall of metal (Ruin/Behemoth) using Energizer (+1 movement per focus spent up to 3) with Butch 3 and the dogs behind it and begin piece trading with the opponent's heavy hitters. The thought is whatever kills Ruin or Behemoth will be killed by either the surviving Warjack or Butcher 3 himself. Butcher 3 can wipe out 3 heavies or a Colossal with ease. The Kayazy Assassins are there to jam and cause trouble with their acrobatic mini feat, the Winter Guard are there to Bob & Weave and handle stealth with sprays and combined ranged attacks, and the Sniper group of Widowmakers and Marksman are there to pick off key solos and weaken front line infantry.


Let's start the game!

Mercs with their +1 Starting Roll end up deploying first. The scenario they are playing is Two Fronts.


Mercenaries deploy with Galleon in the middle with hopes to drag heavies and grind them into dust. The Pirate ball support cast of First Mate Hawk, Lord Rockbottom, Bosun Grogspar, and Doc Killingsworth deploy behind the Sea Dog Boarding crew. The Commodor Cannon and Press Gangers are placed to hold the left zone.


Khador deploys Butcher 3 in the center of the board hoping to get a good shot at the Galleon. The Kayazy Assassins are poised to deal with the Pirate Ball while the Winterguard Death Star, Widowmakers, and Widowmaker Marksman are going to rush the right side since it's only protected by Press Gangers. They have to be careful because they're backed with the very deadly Commodore Cannon.

Mercenaries Turn 1

Mercenaries run up. Shae does not pop his feat and Mr. Walls doesn't pop his mini feat. With all their tricks (Godspeed Feat, No Quarter, Coup De Main) the Sea Dog Boarding Crew has a threat range of 16.5") The Sea Dog Boarding Crew gets quite far up the field. The rest of the army runs forward while the Commodore Cannon slowly trudges along.

Khador Turn 1

Knowing that there's no way to out threat Shae, the  entire Khador army runs up except for Butcher, the Widowmakers, and the Widowmaker Marksman. Everyone else braces for impact. Butcher casts Energize for 3 focus and moves his battlegroup 3". The Widowmakers and Marksman aim and are able to hit 4 Press Gangers but 3 of them tough.

Mercenaries Turn 2

Shae gives Galleon 3 focus in hopes that he can destroy the Behemoth which is his biggest threat (other than Butcher 3) Aiyana is able to land Kiss of Lyliss on the Behemoth forcing him to take +2 damage and Galleon is able to drag him into melee range where he begins to tear into his metal. Unfortunately to Shae's surprise, it is not enough to kill the Behemoth but gets him down to 8 health, leaving just his Cortex and his Right Arm.

Mercenaries Turn 2 Continued

It's up to a Storm Ragered First Mate Hawk to try and finish off the Behemoth or Galleon will be forced to eat an armor piercing fist in the face. She fortunately is able to charge with 4 dice and barely kill the Behemoth leaving just a pile of wreckage.

The Sea Dog Boarding Crew front line is able to charge and kill both Butcher's dogs triggering Vengeance. The rest run to block a charge lane from Ruin/Butcher to the Galleon. The Commondore Cannon critically misses a key roll against Ruin which could have possibly slammed him into Butcher knocking them both down.

Khador Turn 3

Ruin is allocated 1 focus just in case the Sea Dogs tough (which they all failed.) Ruin was able to clear a good late for Butcher and stack up 2 soul tokens. The Winter Guard Infantry combined an attack on a Sea Dog blocking Butcher from Galleon and was able to kill him and forced the unit to make a command check which they failed.

It still seemed too far for Butcher to get to Galleon but by utilizing Energizer and Reach he was able to get a charge off on him. With the help of his feat (regain 6 focus) Butcher murdered First Mate Hawk, Holt, and disintegrated the Galleon with 2 focus to spare. The Kayazy kill off a good chunk of the Sea Dog Boarding Crew and jam up the Mule in the right zone.

Mercenaries Turn 4

It's looking pretty grim for Shae. The Mercenaries were able to retaliate with a stiff Commodore Cannon shot to Butcher, slamming and knocking him down and forcing 5 damage on him. Bosun Grogspar debated whether or not to pitch the knocked down Butcher or just to go for an all out charge. Eventually he decides to charge and rolls fire and is able to take off another large chunk of Butcher 3's health bringing him down to 6 life.

Shae was blocked by Rough Terrain and a Forest so he was not able to see the Butcher. If Shae had known how much impact Grogspar would have he would have shot his gun at Butcher and might have had a boosted chance at killing him. Instead Shae decided to move by the Commodore Cannon hopefully to goad Butcher into trying to finish him off on his own terms.

Khador Turn 4

Khador is by far winning the attrition game and is able to clean up a lot of the Press Gangers and Pirate Ball support cast. Butcher kills Bosun Grogspar and gets behind the forest so the Commodore Cannon can't see him. The Kayazy Assassins are able to take out the objective for 1 point and continue to jam the Mule.

Mercenaries Turn 5

With no jack to allocate to, Shae moves in and wipes out the Widowmakers and tries to hide in the back of Butcher 3's front arc. The Commodore Canon does all it can do and slams Ruin back 3" and knocks him down only doing 5 damage. It looks like all hope is lost for Mercenaries.

Khador Turn 5

Butcher is able to charge at the Mule, cast Impending Doom, and finish both Dirty Meg and the Mule. The Kayazy Assassins run toward the Cannon to hopefully distract it and set up to kill the crew next turn. Butcher scores 2 points for Dominating the enemy zone bringing Khador's total to 3 points.

Mercenaries Turn 6

Knowing all hope is lost, Shae makes a last ditch effort to wreak havoc and clears out a pile of Winter Guard Infantry. He ends his activation staring directly at Ruin The Commodore Cannon shoots its 20" ranged cannon ball and is able to knockdown Butcher 3 and almost push him out of the zone. Unfortunately, the damage still leaves him with 4 health.

At the end of the Mercenaries Turn 6, Khador reaches 5 points with Butcher again dominating the enemey zone.

Khador wins by Scenario Turn 6.

Analysis:

Mercenaries - The Talion Charter is quite limited in model selection and when you drill it down to Shae's A Pirate's Life Tier List it's even more restrictive. The problem with Shae's army is that it doesn't deal with Heavy Warjacks very well. The Galleon is a monster but when he's gone, there's nothing the rest of the army could do.

To get the most out of this Mercs list the key thing would be to get more work out of the Commodore Cannon. The Commodore Cannon is so powerful and can slam models with a RAT 8 - 20" Ranged shot that does POW 16. It's pretty amazing but it's so slow. People sometimes throw the Cannon to get it up the field quicker but that means bringing a jack with open fists.

If you see that your opponents have multiple threats to Galleon you could sacrifice positioning in the enemy zone and use some Press Gangers to block charge lanes to it allowing the Galleon to get a second drag off against Butcher or Ruin and probably swing attrition to Merc's favor.

I love the Talion Charter list but it's defintiely going to struggle against ARM skews and there's not much to change that other than good positioning, making better use of the Commodore Cannon, and defending your Galleon well.

The Jack Marshalled Mule didn't pull his weight. It might be a better idea do drop it and get another unit of Press Gangers +2 Riflemen for the Sea Dog Boarding Party. It's still overly infantry that doesn't pack a huge punch. You'll definitely be playing for scenario.

Khador - Butcher 3 is so amazingly strong it's absolutely ridiculous. On his feat turn he was able to completely decimate the Galleon and 2 good defense models (Holt & First Mate Hawk.) The original plan about piece trading worked like charm. Behemoth was sacrificed for a Galleon and after the Galleon was dead, there wasn't anything on the board that could take out butcher reliably.

The Kayazy Assassins did a wonderful job of mini feating and taking out Lord Rockbottom and Doc Killingsworth severely hampering the strength of the Pirate Ball. They were also able to Jam up the Mule and put pressure on the Commodore Cannon towards the end of the game.

The Winter Guard Infantry was ok. They handled the Press Gangers well but it seemed like they could have wiped them out faster. With Bob & Weave they're DEF 14 and with Kovnik Joe they have Tough so they were pretty annoying. Their combined ranged attack made sure key models blocking Butcher from Galleon  were dead really helped.

The Widowmakers + Marksmen were able to plink off a few shots but didn't do as much work as I thought because of the tough rolls made by the Mercs. They are definitely needed espeically vs. The Covenant of Menoth or Orin Midwinter which can completely shut down Butcher 3.

If there's anything I would change it might be swapping the Winter Guard Death Star with Winter Guard Riflemen to pick off pesky high DEF infantry. Butcher and Ruin can handle the big stuff while the Riflemen with Kovnik Joe can deal with the infantry. Although, the Deathstar is great vs. Stealth which could pose a problem in some matchups.

I would also consider dropping Behemoth for a Juggernaut and picking up either Doom Reavers or dropping 1 Rocketeer or War Dog and picking up a second Juggernaut.

In the end, Captain Phinneus Shae survived and was able to dent the Khadorian forces but ended up giving up too much ground. Butcher laughed maniacally as army controlled the battlefield and dominated the game.


Thursday, September 10, 2015

Mercenaries vs. Trollbloods - Bartolo Montador vs. pGrissel


I was lucky enough to get 2 games in this week at a game store called GMI Games in Riverside, CA. I had never played at a store before so I was quite nervous till the league organizer, Joe, welcomed us in.

I had only ever played games against five other factions (Cygnar, Cryx, Retribution, Legion and Trollbloods) and I was excited to get a chance to play against something new. I ended up playing two games against Trollblood (doh) but the list was something I had never encountered.

The first game I played was my Mercenaris vs. pBorka in a 50 point mach up which you can read about here.

The second game was 35 points against the League organizer, Joe, and his pGrissel list.

(35 points) Bart's Batten Down The Hot Shot

Warcaster: Bartolo Montador (-5)
Warcaster Attachment: Slys Wyshnalyrr, the Seeker (+2)
Colossal: Galleon (+18)
Unit: Kayazy Assassins (+8)
Unit Attachment: Kayazy Underboss (+2)
Unit: Aiyanna & Holt (+4)
Solo: Master Gunner Dougal MacNaile (+2)
Solo: Ragman (+2)
Solo: Saxon Orrik (+2)

My goal with this list was to set up Galleon as a Hot Shot Colossal turret in the middle of the field while Bart gives him Batten Down the Hatches for +3 armor and gives him a second turn of shooting with his knockdown if moved into control area feat.

The Kayazys would jam while Ragman hid behind the Galleon using Death Field (-2 Armor) to make sure that anything the Galleon dragged in would be blown to smithereens.

Aiyana & Holt would be able to clear paths for the Galleon and Kiss of Lyliss (-2 ARM) would give allow the Kayazys (POW 12, Mat 9 with Gang) to take down some of the other Warbeasts and tough units.

(35 points) pGrissel List

Warcaster: Grissel Bloodsong, Fell Caller (-5)
Warbeast: Earthborn Dire Troll (+10)
Warbeast: Dire Troll Bomber (+10)
Warbeast: Troll Impaler (+5)
Unit: Krielstone Bearer & Stone Scribes (+4)
Unit Attachment: Stone Scribe Elder (+1)

Unit: Trollkin Fennblades (+8)
Unit Attachment: Fennblade Officer and Drummer (+2)

Turn 1 Mercs - I gave the Galleon Hot Shot (Upkeepable Boosted Ranged Damage Rolls) and charged Bart up the field. Everyone else just ran and spread out a bit. I didn't know what was about to come.

In the middle of Trollbloods Bottom of Turn 1

Turn 1 Trollbloods - My opponent used his mini feat on his Fennblades (+2 Speed) and ran them up 16". He then ran up everything else and had pGrissel pop her feat which allowed her entire army to make a full advance. This meant he was 34" into my zone with the Fennblades. He was able to engage my Kayazy and my Galleon and built a nice wall of Fennblades blocking his Earthborn Dire Troll, Bomber, and Impaler.

 Round 2

Turn 2 Mercs - I was pretty shocked and didn't see that coming. I figured since I went first I'd dictate the line of battle with my Kayazy and then use a Hot Shotted Galleon to pick everything off one by one. At the beginning of my turn I kept up Hot Shot on the Galleon and gave him 3 focus. My goal was to find a way to get Galleon a path to drag in his Earthborn Diretroll any means possible.

The first thing I did was activate my Kayazy and used their mini feat which allowed them to move through other models. With this I was able to charge my Kayazy at the Fennblades blocking his Earthborn Dire Troll. With their MAT 9 and POW 12 (+2 to both due to Gang) I was able to clear most of the way for my Galleon.

Aiyana was unable to get Kiss of Lyliss (+2 to all damage taken) on the Fennblades and they were too far to get it on the Earthborn. Holt was able to pick off one of the Fennblades by aiming (RAT 10) vs. their 16 defense (+4 for being in melee). The Fennblades' reach really screwed with my shooting.

I then activated Ragman and had him cast his Death Field and hide behind the Galleon so I would be sure to crush the Earthborn. The Galleon went it and rolled fire. He was able to pop 5 shots into the Earthborn to soften him up and 1 into the Krielstone. He then used his Trident to drag the Earthborn to him and crushed him with melee attacks.

I rolled very well this turn and I almost felt bad. Most of my die rolls were 5-6 through the whole activation. It didn't matter too much because most of my attacks only needed 5's to stick and damage. I was also rolling +3 damage against the Earthborn which made quick work of him.

Before I ended my turn I was dumb and decided to put Bart on a hill and surround him with Kayazy thinking he'd be safe. I was wrong. I ended my turn casting Batten Down the Hatches (-2 DEF +3 ARM to Battlegroup)

I was also too eager and nervous and forgot to pop my feat which would have sealed the game right then and there.

Turn 2 Trollbloods - This was an all or nothing turn for my opponent. He really needed to get the assassination off because he had nothing left to take the Galleon.

His first move was to give Snipe to his Bomber (+4 Range) and then move him up so he could see Bart. I totally forgot that my Kayazy didn't block LOS because they were stealth! He made sure he outside of 5" of them but still within range of Bart and lobbed 2x RAT 5 POW 16 shots which were both boosted and hit bart for a total of 6 damage. I got off pretty lucky.

His Fennblades attacked my Kayazy (DEF 16 in melee) which missed a lot and only manged to get 2. He then moved up pGrissel behind the Bomber and launched Rift at the Kayazy, killing 3 and forcing me to make a tough check which they failed.

Turn 3 Mercs - I kept up Hot Shot on the Galleon and gave him 3 focus. I tried really hard to find a way to kill pGrissel but I couldn't. She was camping transfers and I couldn't get a good angle to her for a drag so I changed my plans to kill the Bomber.

My Kayazy run backwards to protect Bart from charges and rally at the end of their activation.

Aiyana fails to land Kiss of Lyliss on both the Bomber and the Galleon (whew) and Holt was able to take out 2 Fennblades with his guns.

Ragman moves up and gives himself (and Galleon) Death Field.

The Galleon then Activates and I roll fire again and was able to demolish the Bomber which left pGrissel wide open.

Dougal charges a Fennblade but fails.

I forget to feat again! I cast Batten Down the Hatches which was a horrible idea because it dropped my DEF by 2 boosting my ARM 3 but it cost me 3. There was nothing on his side of the board that could have taken Galleon anyway so I just nerfed myself 2 DEF.

Round 3 - Final


Turn 3 Trollbloods - pGrissel ran her beasts hot last turn so she was stuck making a frenzy check on the Impaler which failed. The Impaler charged and killed his own Fennblade.

I thought I was pretty safe vs, his army but I forgo that pGrissel has a spray and Rift. It was all or nothing again for my opponent and he moves up and casts a Rift needing a hard 9 to hit and it stuck. Bart takes a boosted POW 13 against his 19 armor which he takes 7 damage taking him to 4 health.

After that, pGrissel shoots her spray 8 at Bart needing 10's. He boosts and is able to hit and Bart takes a boosted POW 12 to his 19 ARM. My opponent rolls a 10 which does 3 damage leaving Bart on 1 box.

The store was about to close and pGrissel was sitting on no fury in melee with the Galleon so he conceded and shook my hand.

Final Thoughts: I definitely almost handed this game to my opponent by stick Bart on tht hill. What I should have done was to hide him behind the Colossal and he would have been just fine. I also forgot that the Kayazy had stealth which hurt me because they didn't block LOS. I also had 2 chances to Feat (Knockdown any enemy models that end movement within Bart's control and gives them -3 attack) which would have sealed me the game but I totally forgot to do it. I also shouldn't have casted Kiss of Lyliss against a Fennblade that was engaged with my Galleon but I was lucky I missed both.

Looking at the picture, Galleon might have had reach so pGrissel wouldn't be able to make her Hail Mary shot but I can't really tell.

It was really fun to play something and someone new. Joe, my opponent, knew what my models did and didn't have to sit and read my cards which was really nice. I'm looking forward to going back to GMI next week.

Wednesday, September 9, 2015

Trollbloods vs. Mercenaries Battle Report - Bartolo Montador vs. pGrissel


I've never played at a local gaming store and today was my first time. I was nervous at first but after meeting a couple of the regular players I was ready to get a couple games in.


The first game I played I brought a Bart/Galleon Mercenaries list that I wanted to try.

Bart's Gun N' Stun

Warcaster: Bartolo Montador (-5)
Warcaster Attachment: Slys Wyshnalyrr, the Seeker (+2)
Colossal: Galleon (+18)
Warjack: Mule (+8)
Warjack: Mariner (+8)
Unit: Cylena Raefyll & Nyss Hunters (+10)
Unit: Aiyanna & Holt (+4)
Solo: Master Gunner Dougal MacNaile (+2)
Solo: Eiyrss, Angel of Retribution (+3)

My opponent Brought:

pBorka List

Warlock: pBorka (-5)
Warlock Attachment: Pyg Keg Carrier
Warbeast: Earthborn Dire Troll (+10)
Warbeast: Troll Axer (+6)
Unit: Northkin Fire Eaters (+4)
Unit: Trollkin Champions (+10)
Unit Attachment: Skaldi Bonehammer (+3)
Unit: Krielstone Bearer & Sone Scribes (+4)
Unit Attachment: Stone Scribe Elder (+1)
Solo: Horgle, Ironstrike (+3)
Warbeast: Pyre Troll (Attached to Horgle) (+4)
Solo: Fell Caller Hero (+3)
Solo: Troll Whelps (+2)
Solo: Trollkin Champion Hero (+3)
Solo: Alten Ashley (+2)

The goal of my Bart list was to set up my Galleon, Mule, and Mariner to pop off a ton of shots with broadside. I would use the Nyss to jam up the other side and hold off any charges. When I pop my feat I would be able to buy a second turn of guns, hopefully softening him up to be crushed.

The whole 3 Warjack thing didn't work out at all. I needed to put 3 on Galleon so he had enough juice to drag in and finish of heavies. The other 3 focus were spent on Batten Down the Hatches to keep my jacks alive.


In the first round I was able to push my Nyss up to control my enemy's flag and I was able to dominate with Bart on my friendly flag. By the end of the 3rd round I was able to accumulate 3 points.

After that, things went a little bad. My Nyss were decimated by the Pyre troll and Champs. Ryan had positioned his Axer and Earthborn behind rocks so I was unable to drag them to my Galleon. His Champs had Iron Flesh + set Defense + Krielstone which made them pretty hard to kill. Fortunately my Feat bought me a turn. (Models that end their movement in Bart's control area are knocked down and any enemies inside the control area suffer -3 to attacks)

With some buffs and stuff the Earthborn was able to get into melee range with the Galleon and he began beating the crap out of him. The Galleon lost his Left Side from the Earthborn Dire Troll and when I retaliated I was unable to kill it with 6 boosted POW 13 Shots, a Boosted POW 15 shot, and 4x POW 21 Melee hits.


It was a sad day for the Galleon. Fortunately one out of the 9 remaining of my Nyss survived the onslaught of Champs and Hero Champ and contested his friendly flag. My opponent was too far away to contest my friendly flag and I was able to squeeze out a victory.

If it were to go on any longer, the next turn he would have sent in all his champs and Troll Axer and finished off my Galleon. Luckily I was able to score 1 on his turn and 1 on my turn giving me 5 points and the last minute win.

After writing this I also realized that he had a knocked down whelp next to my flag which we didn't count as contesting but I later found out that it did so I would have only had 4 points. He would have had to run his guys through rough terrain to contest on his turn and I have a feeling I would have been able to handle a 1 or 2 Champs to clear out my flag for a win. Oh well.


What would I change about my list? Well having the two other jacks were kind of worthless. They can't do much to heavies without the focus to boost. I never even used Broadside once because I needed to give 3 focus to Galleon and pump everyone's ARM +3.

I would definitely drop the Mule and Mariner and pick up another infantry unit to jam up charge lanes against the Galleon and let his Hot Shot'd guns do the work.

Kayazys would have been great to take on the champs or maybe some Press Gangers to buy some time for the Galleon. Ragman would have also been great to take down the Earthborne that I had to boost to hit.

Overall it was a good game and I was happy I won. It was a great experience to play in public and I got over my fear of game stores :)

Tuesday, September 8, 2015

Finished Mercenaries Colossal: The Galleon Conversion!

Mercenaries Galleon Conversion
The Galleon Crushes his Cygnarian Foes

The Galleon has been my most sought after model after picking up Mercenary pirates in a trade. His giant crane claw and his pointy stabby trident harpoon makes me all giggly and squeely. My hatred for Cygnar is shown in hte model. He is crushing an Ironclad and clamping down on a Lancer. I also wanted to give him more of an animated pose so it wasn't so boring.
I was able to trade a bunch of D&D stuff for a majority of the Pirate Boat and the Mercenary paints from my friend, Jeremy. I went for a dirty dry brush rusty metal look which I'm happy with
The Galleon has a nice set of guns but the Trident is the absolute best for crushing Warjacks/Warbeasts. You get a 15" threat range with it (including movement) and you can suck up an enemy warjack (maybe even out of their warlock/warcasters control area) and if you're loaded up with 3 Focus you can smash a POW 15 range attack and 4 normal POW 21 which is enough to wreck almost any Warjack.
This is by far my favorite looking model and I've definitely enjoyed playing it.